How Do You Choose Press-On Nails That Actually Fit Well?
Press-ons are loved in the United States for their ease and style. But the key to wearing them all week is finding the right fit. Start by focusing on comfort, then pick your style.

When choosing press-on nails, look for a snug fit. They should cover your nail bed fully and sit smoothly. Make sure they don't press into your cuticle or sides.
Finding the right size can be tricky, but it's worth it. It may take some trial and error. But once you find your perfect fit, applying them becomes easier and they last longer.
Why a proper fit matters for comfort, wear time, and nail health
A manicure looks great but feels wrong if it's the wrong size. The right fit means no pressure on your nail and staying in place all day. It's what makes press-on nails comfortable to wear.

What “fits well” really means: full nail-bed coverage without touching skin
Good fit means covering the nail bed fully. The press-on should go from one sidewall to the other without falling short. It should also not be so wide that it touches the skin near the cuticle or sides.
This clean edge contact is essential for natural-looking nails. It prevents them from looking bulky.
- Full coverage from left to right sidewall
- No overlap onto skin
- A smooth lay that follows your natural curve
How overly tight press-ons can lead to pain, lifting, and repeated pop-offs
Press-ons that are too tight hurt right away. They can pinch and make everyday activities uncomfortable, even if they look good.
This tight pressure can also cause lifting and repeated pop-offs. Even with the best nails and prep, it can happen.
Why a snug (not tight) fit supports durability and a natural-looking finish
A snug fit is better than a tight one. When the nail fits your natural width and curve, it lays flat and seals well. This is the key to comfortable press-on nails.
It also makes the nails look better. With the right size, the edges fit perfectly and the nails stay sleek. This gives them a salon-like finish and helps them last longer.
Press-on nails fit guide, Proper press-on nail fit, Comfortable press-on nails
Getting a great set starts with the right sizing. This guide makes it easy, even with different nail shapes and sizes. By matching width and curve, you get nails that are both comfortable and stylish.

Sidewall-to-sidewall measuring: where to measure on the widest part of your nail
To fit right, measure from one sidewall to the other at the widest part of your nail. This spot is where your nail naturally gets wider. It helps avoid nails that are too tight or too loose.
- Look straight down at the nail and find the widest point.
- Measure across that spot, not near the cuticle and not at the free edge.
- Use the same point on every finger for clean, repeatable sizing.
Follow your natural curve for more accurate sizing and a more comfortable seal
Your nail isn't flat, so your measuring line shouldn't be either. Measure along the natural curve of your nail. This makes the nails fit better and stay in place longer.
If a tip feels tight later, it might be because of the curve. A curved fit spreads out the pressure, making the nails more comfortable to wear.
How to test-fit: try the size that covers both sides, then confirm if a smaller size also covers perfectly
After measuring, do a quick test before applying glue or tabs. Place the press-on nail on your natural nail and check from different angles. You want a fit that covers both sides without touching your skin.
- Start with the size that covers both sides.
- Try one size smaller and check again from multiple angles.
- Stop at the smallest size that covers perfectly.
This test-fit step helps you find the right fit, even with different nail shapes or tip styles. It ensures your nails look great and feel comfortable.
How to measure your nails at home for accurate press-on nail sizing
Start by making sure your nails are clean and bare. Good lighting is also key. Warm hands are best for measuring, as cold can make your nails seem smaller. Learning to measure your nails correctly helps ensure a perfect fit and a smooth look at the cuticle.
Using a soft, flexible tape measure in millimeters (edge to edge)
Choose a soft, flexible tape in millimeters, not inches. Measure the widest part of your nail, following its natural curve. Don't pull the tape straight across.
- Place the tape at one edge and wrap it gently over the nail’s curve.
- Read the width in millimeters at the opposite edge.
- Write down each finger’s number right away to support proper press-on nail fit.
Using clear tape + marker + ruler method to capture your nail’s curve
Clear tape is a good alternative if you don't have a soft tape. Press it over the nail to follow its curve, then mark both edges with a permanent marker.
- Remove the tape and stick it flat onto a ruler.
- Read the distance between the marks in millimeters.
- Record the width for each nail to keep press-on nail sizing consistent.
Tracking left hand vs. right hand sizes (they can differ)
Hands can be different, with thumbs and index fingers often being smaller on one side. Track left and right separately. Label each finger (L thumb, R thumb, and so on). This makes ordering easier and ensures a better fit every time.
Cross-checking: comparing your nail width to the inside width of the press-on
For a more reliable match, compare your nail width to the inside width of the press-on. If your nail is 14 mm and the press-on is also 14 mm, it's a good match. This quick check helps when two sizes seem close.
Choosing the right size system: 20-piece sets, S/M/L kits, sizing kits, or DIY measurements
There are a few ways to find the right press-on nail size. Each method changes how easy it is to get it right at home. Start by picking a system that feels right for you and your nails.
Full multi-size sets (often 20 pieces) are a great starting point. They offer many widths, letting you test several on each finger. This way, you can find the perfect fit without worrying about getting it right the first time.
Pre-made S/M/L kits are quick and easy, perfect for when you're in a hurry. They work well if your nails are mostly the same size. But, if your nails vary, the fit might not be perfect, leading to lifting issues.
Sizing kits offer a balance between guessing and custom work. You test each finger to find the right size. Remember to note both hands, as thumbs and index fingers often differ.
- Test-fit and confirm the nail covers both sides without pressing into skin
- Write down the number for each finger on the left and right hand
- Reuse those numbers when you reorder or try a new length
DIY measurement submissions are best for a precise fit before ordering. Measure each finger's width in millimeters, left and right hands separately. This method ensures a more accurate fit, even when changing nail shape or length.
Picking nail shape and length for a natural fit press-on nails look and press-on nails for daily wear
Shape and length do more than change your style. They also change comfort, grip, and how long a set stays put. When you’re shopping for press-on nails for daily wear, start with a look that matches your hands and your routine.
Matching your cuticle curve to the press-on shape for a more seamless, natural fit
For natural fit press-on nails, start with your cuticle line. Check if your cuticle curve is rounded, flat, or somewhere in between. A press-on that mirrors that curve tends to sit flush and looks more like a real manicure.
If the base feels like it crowds the skin at the sides, the shape is off even if the width is “right.” If it leaves gaps near the cuticle, it can lift sooner. A clean match helps the edges seal without digging in.
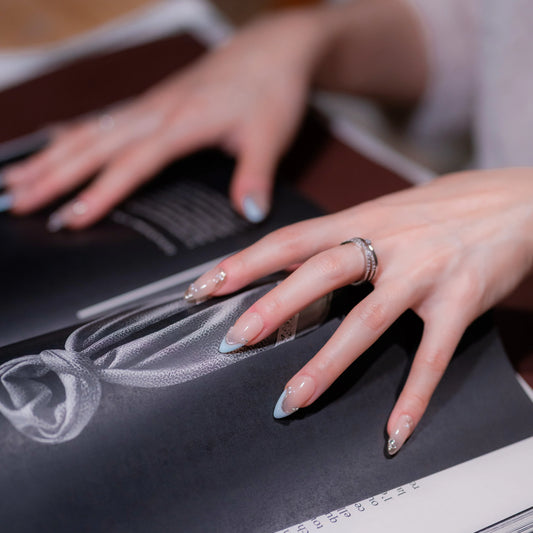
Short press-on nails for typing, chores, and everyday comfort
Short press-on nails are often the easiest to live with. They can feel steadier for typing, dishes, workouts, and busy days. Less length also means less leverage at the tip, which can reduce bending and snagging.
For many people, shorter sets also feel lighter and more natural. That small change can make daily wear more comfortable, even if you use your hands a lot.
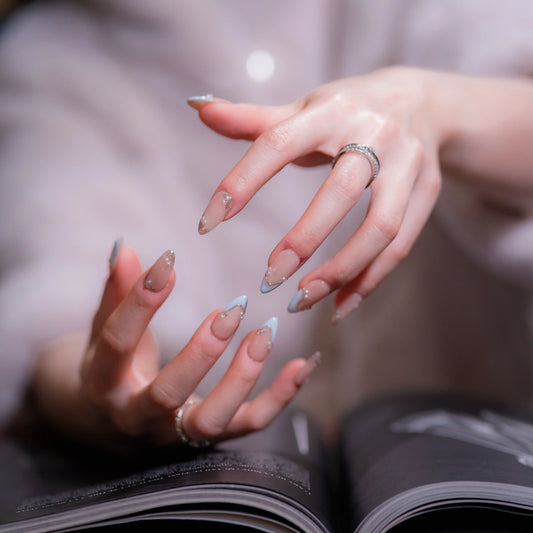
Almond press-on nails for an elongating look while staying wearable
Almond press-on nails can make fingers look longer because the tip narrows in a soft way. They tend to look polished without needing extra length. If you want a refined shape that also works for real life, try almond in a short or “short almond” length.
That balance keeps the look sleek while staying practical. It’s a common choice for people who want style without losing function.
How shape and length can change how “tight” a set feels on the same size nail bed
Two nails can have the same measured width and yet feel different. Shape changes the sidewall curve and how the press-on hugs your nail. Length changes leverage at the free edge, which can make a set feel tighter during daily tasks.
When switching between short press-on nails and almond press-on nails, take time to test-fit again. Even a small difference in curvature or coverage can change comfort and how secure the edges feel for press-on nails for daily wear.
InchArt approach: handmade press-on nails designed for precise sizing and comfortable wear
InchArt is a Vancouver-based brand known for its handmade press-on nails. They aim for a natural look with clean lines and balanced length. Their goal is to offer high-quality nails that look polished but don't feel heavy.
Fit is key for InchArt. They design nails that cover the full nail bed without touching skin. This ensures a snug fit, preventing lifting and giving a seamless finish.
To get the right fit, measure your nails like a pro. Measure from sidewall to sidewall at the widest part. Choose the smallest tip that covers your nail fully for a secure fit.
When you size correctly and choose the right shape and length, comfort follows. Reusable press-on nails, like InchArt's, support repeat wear. They aim for a natural look that stays neat and feels like it belongs on your hands.
FAQ
How do you choose press-on nails that actually fit well?
Start by making sure the nail covers your entire nail bed sidewall-to-sidewall. It should feel comfortable and not touch your skin. Remember, nails are not one size fits all. You need to measure carefully and test the fit.
What does “fits well” mean in a press-on nails fit guide?
A: Press-on nails that fit well cover the nail bed from side to side. They should not fall short on the edges or touch your skin. This width makes them look natural and feel comfortable.
Why does a proper press-on nail fit matter for comfort, wear time, and nail health?
A proper fit is key for comfort and health. It prevents lifting and supports longer wear. It also makes daily tasks more comfortable, which is important for press-on nails for daily wear.
What happens if press-ons are too tight?
Too tight press-ons can be painful. They make everyday tasks uncomfortable. They also lift and pop off often because of the pressure.
What’s the goal—tight or snug?
Aim for snug but not tight. Your press-ons should match your natural nail width. This ensures a seamless look and longer wear without discomfort.
Where exactly should I measure for press-on nail sizing?
Measure sidewall to sidewall at the widest part of your nail bed. This is the core rule in any press-on nails fit guide. It ensures consistent sizing across brands.
Why do measurements need to follow the natural curve of the nail?
Nails aren't flat, so straight measurements can be off. Following the natural curve improves accuracy. It supports a natural fit press-on nails look without feeling restrictive.
How do I test-fit press-ons if I’m unsure between two sizes?
Place a press-on on your nail and check side coverage from different angles. If it covers both sides, try the next smaller size. Keep going until you find the smallest size that covers perfectly. This size usually feels the most comfortable and natural.
Why does press-on nail sizing vary between shapes, lengths, and tip styles?
Sizing varies because nail beds differ and nail artists use different tips. Even within one brand, different shapes and lengths fit differently. This is why a consistent measuring method is key when choosing press-on nails.
How do I measure at home using a soft, flexible tape measure in millimeters?
Use a soft measuring tape on the millimeters side. Measure edge to edge at the widest part of the nail bed while following the curve. Record each nail's width. This is the foundation of accurate press-on nail sizing.
How do I use the clear tape + marker + ruler method?
Place clear tape across the nail, following the curve. Mark each sidewall edge on the tape with a permanent marker. Remove the tape, then lay it flat on a ruler to read the measurement in millimeters. Record the width for every nail for more accurate press-on nail sizing.
Do I really need to track each finger on both hands?
Yes. Left and right hands can differ, even on the same finger. Document sizes for each finger on each hand. Keep the list for future reorders for a better fit.
How can I cross-check measurements for accuracy?
Compare your measured nail width to the inside width of the press-on. A common example is when a 14 mm measurement matches the inside width of a size 3 press-on. Cross-checking confirms you're matching true contact points, not the outer edge.
Do multi-size (often 20-piece) sets make sizing easier?
Yes. Full multi-size sets reduce pressure. You can test multiple widths at home and find the best fit per finger. This is helpful for press-on nails for beginners learning what “snug but not tight” feels like.
Are S/M/L pre-made sets a good option?
They can be convenient and offer flexibility. But the fit may be slightly off compared with finger-by-finger sizing. If your nail beds aren't uniform, S/M/L sets may leave some nails a touch narrow or wide, affecting comfort and wear time.
How do numbered sizing kits work for choosing press-on nails that fit well?
You test-fit each finger with numbered nails using the sidewall-to-sidewall rule. Then, record the number that matches each finger for both hands. Submitting those numbers reduces guesswork and helps you get a closer match than general sizing.
If I submit DIY measurements, what should I record for the best natural fit?
Record millimeter widths for each finger on the left and right hands separately. Measure sidewall-to-sidewall at the widest part while following the natural curve. This supports a more accurate, natural fit press-on nails result when your set arrives.
How do I choose a press-on shape that looks the most natural?
Match your natural cuticle curve. Choosing a press-on shape that mirrors your cuticle line creates a more seamless look. It makes the set appear like it was made for your hands.
Which styles are best if I want comfortable press-on nails for daily wear?
If you type often or do manual tasks, short press-on nails tend to feel more practical and comfortable. They're less likely to catch and put less leverage on the nail, making the manicure feel easier to live with.
Are almond press-on nails wearable for everyday life?
Yes—especialy in shorter lengths. Almond press-on nails can elongate the look of your fingers while staying wearable when kept short. They strike a balance between refined style and comfort.
Why can the same width feel tighter in a different shape or length?
Shape and length can change perceived tightness. Differences in curvature, coverage, and leverage at the free edge matter. Even if your measured width is identical, a longer or more curved style can feel snugger. This is why test-fitting matters when switching shapes.
Why do some people say sizing feels tedious at first?
Measuring, recording, and test-fitting each finger takes time. But it becomes easy with repetition. It's well worth it: accurate sizing improves comfort, longevity, and that natural “made-for-you” look.
Why are press-ons so popular, and what makes them truly wearable?
Press-ons are popular because they're easy to use, save time, and come in many design options. But what makes them truly wearable day to day is comfort and fit. When the nail covers the full nail bed without touching skin and feels snug, not tight, they're perfect.
What is InchArt, and how does the brand approach fit?
InchArt is a Vancouver-based brand known for high-quality press-on nails with a handmade focus. InchArt emphasizes a fit philosophy built on natural shape, precise sizing, and wearable design. This ensures sets feel comfortable and look effortless from the first wear.
How does InchArt’s sizing approach align with best-practice press-on nail sizing?
InchArt’s approach aligns with core fit behaviors: measuring sidewall-to-sidewall at the widest part, following the natural curve, tracking left vs. right differences, and using test-fitting to find the smallest size that covers perfectly. This method supports comfort, durability, and a natural finish—ideal for reusable press-on nails intended for repeat wear.
Previous
How Do You Make Press-On Nails Stay Secure Without Glue Damage?
Next
Experience Comfortable Style with Press On Nails Online from InchArt