How Do You Make Press-On Nails Stay Secure Without Glue Damage?
Many of us face a challenge: we want our press-on nails to stay put through our busy days. Yet, we don't want to harm our natural nails in the process.

After taking off press-on nails, we often see damage. This can include a rough surface, uneven texture, or mild discoloration. Most of the time, the problem lies with the adhesive and how it's applied and removed.
But, the good news is that you can avoid damage. By preparing your nails right, bonding carefully, and removing slowly, press-ons can be gentler than many other nail services.
This guide aims to help you find press-on nails that are both secure and natural-looking. We'll also highlight InchArt, a Vancouver brand known for its handmade sets. These are designed for a natural fit, refined style, and gentle wear.
Why nail glue damage happens with press-ons (and how to prevent it)
Many people think press-ons cause nails to feel rough after removal. But, it's really how adhesive interacts with the nail's surface that's the problem. Nail glue damage builds up after a long wear, when the bond is strong and removal is hard.

To have press-on nails without damage, it's important to understand what's happening. Knowing this makes it easier to avoid damage without sacrificing a secure set.
What “keratin granulations” are and why nails can look uneven, discolored, or peel after removal
Dermatologist Dr. Dana Stern calls “keratin granulations” damaged nail cells. These cells, called onychocytes, separate from their protective structure. After removal, they can look like patchy, chalky, uneven areas on the nail plate.
This can show as uneven texture, mild discoloration, or peeling at the free edge. It's more common when adhesive stays on for days and then comes off quickly. This is why nail glue damage can seem worse after a set that looked great.
How dehydration occurs when adhesive is applied and then lifted off the nail plate
Adhesive can dry out the nail plate. During wear, the glued-on top layer can become dry and dehydrated. This is more likely if your nails are already brittle.
When you remove the adhesive, some weakened surface cells may lift away. Others may stay behind, leaving a rough feel and encouraging peeling. This can happen even if the natural nail underneath is fine.
Why the nail plate (not the nail bed) is what typically gets damaged by adhesives
Most damage from adhesives is to the nail plate, the hard keratin structure. The nail bed, the soft tissue underneath, is usually not affected when press-ons come off.
To avoid nail damage with press-on nails, reduce stress to the nail plate. Use a thin, controlled amount of adhesive. Add a barrier layer when needed. Soak to soften the bond. And avoid forceful peeling. These habits help prevent nail glue damage and support press-on nails without harm.
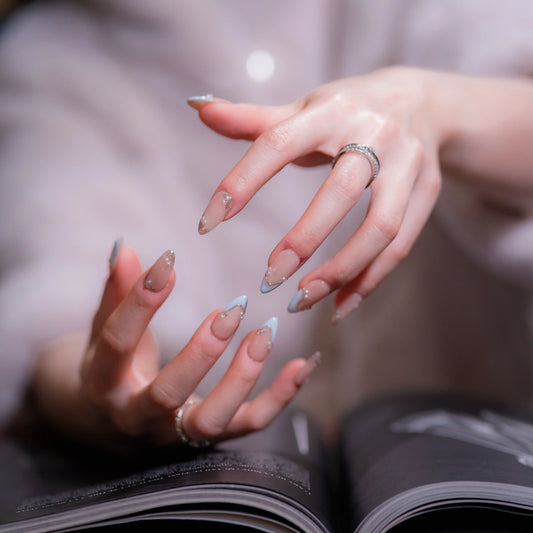
Press-on nails stay secure, Comfortable press-on nails without damage
When you want comfort and a clean look, "secure" means more than just glue. The best press-on nails feel like they're a part of you, not just sitting on your nails. They stay in place well, making them feel more natural.

How long press-on nails can last with proper prep and care (often about a week or two)
With the right prep and care, press-on nails can last about 1–2 weeks. Nail glue usually lasts longer than adhesive tabs. This is true if your nails fit well and you avoid soaking them too much.
But, your daily activities can affect how long they last. Washing your hands a lot, taking hot showers, and using harsh cleaners can make them come off sooner.
Why fit + prep + aftercare matter as much as adhesive choice for daily wear
Adhesive is important, but fit is key. If your nails are the wrong size, they can lift early. This creates gaps that can trap moisture, making your nails feel less comfortable.
- Fit: Full coverage and a smooth cuticle line help keep nails in place without needing to constantly check them.
- Prep: Clean nails and a bit of surface traction help prevent slipping and early lifting.
- Aftercare: Wearing gloves for dishes, handling things gently, and avoiding picking at edges helps keep the nails bonded.
How InchArt supports secure, gentle press-on nails with a natural-fit focus
InchArt focuses on making nails that feel natural. They aim for a fit that's comfortable and secure. This way, your nails can handle daily activities without issues.
InchArt's approach matches the whole guide: prep, choose adhesive, apply safely, and take care of them daily. This routine helps your nails look and feel like a real manicure while keeping your nails healthy.
Prep for press-on nails without damage: clean, buff lightly, and protect your natural nails
Prep is key to avoiding wear problems. A clean, even nail surface helps adhesive stick better. This makes press-on nails last longer and feel more secure.
Start with a bare nail: remove residue and excess oils so adhesives bond better
Start with clean nails. Remove old polish and glue for a smooth surface.
Use acetone to remove oils. Let nails dry before applying anything. Moisture can cause lifting.
Light buffing to create traction (without over-filing) to reduce early lifting and air pockets
Use a fine buffer gently. Aim for a soft texture, not thin nails.
Don't over-file. It can make nails weak. A light buff helps prevent air pockets and makes nails feel more stable.
Push back cuticles (don’t trim) to help the press-on sit flush and last longer
Push back cuticles after washing and drying. This helps the press-on fit better at the base.
Don't trim cuticles. Small cuts can hurt under adhesive and make wear harder.
Add a protective barrier layer to reduce direct contact between nail plate and glue
A thin base coat acts as a buffer. It protects the nail plate from glue during removal.
Some use glitter polish for extra protection. But it's harder to remove and can dry out your nails and skin.
- Clean and dry nails before adhesive to reduce lifting and moisture trapping.
- Buff lightly for traction, then stop.
- Protect the nail plate with a simple barrier for gentler press-on nails.
Choosing the right adhesive method: press-on nails adhesive tips for secure hold
The right adhesive can make a big difference. It affects how long your nails stay on and how easy they are to remove. These tips focus on control, matching the method to your schedule and keeping the adhesive off your skin.
Nail glue vs. adhesive tabs: wear-time tradeoffs and why tabs can be gentler
Liquid glue lasts longer, making it great for busy weeks. Adhesive tabs are better for short-term wear, like events or travel.
Adhesive tabs are also gentler on your nails. They have a gel-like grip that reduces seepage and is easier on the nail surface. This makes them perfect for reusable press-on nails, as they're easier to remove and keep clean.
How using too much glue increases seepage risk and potentially irritation
Using too much glue is a big no-no. It can seep out and irritate your cuticles or nail sides. This can cause redness, stinging, or lifting later.
Dr. Dana Stern recommends using just a tiny amount of glue. A thin layer supports your nails and reduces mess, lowering irritation risk.
When shorter wear (weekend sets) can reduce removal stress for reusable press-on nails
Wearing nails for shorter periods can be better for your nails. It reduces stress during removal, which is great for reusable nails. This method also makes cleaning up between wears easier.
Choosing the right adhesive is important, but it's not everything. Proper sizing, prep, and removal habits are also key. Follow these tips to minimize damage and keep your nails looking great.
How to apply press-on nails safely for a natural fit and long-lasting hold
Getting started is key. A good fit and careful steps make press-on nails look and feel better. They stay on longer too.
Work on one finger at a time. This method slows you down and helps the nails stay in place better.
Find the correct size for every finger
Finding the right size is essential. The tip should fit snugly without pinching or gaps.
- If it's too small, it will lift at the sides.
- Too big and it might catch on things, coming off sooner.
- Edges lifting can trap moisture, causing greenish discoloration.
Customize sizing with gentle shaping
If sizes don't match, go bigger and shape it. File the sides until it fits perfectly. Then, buff the edge to smooth it out.
This makes your nails feel like they were made for you, not just picked from a kit.
Apply adhesive evenly to prevent bubbles
A thin layer bonds better than a thick one. This avoids air pockets that can cause nails to come off early.
- Use just the right amount to avoid getting it on your skin.
- Apply a thin layer to both the nail and the underside of the press-on for a stronger bond.
- Make sure the center and edges are fully covered to prevent gaps.
Use the right press technique for a stronger seal
Place the tip at a 45-degree angle near the cuticle. Then, roll it down toward the free edge. This pushes out air and spreads the adhesive evenly.
Press each nail firmly for 20 seconds. Then, pinch the sides to secure it. This way, you'll apply the nails safely and keep them looking great.
Everyday habits that help press-on nails for daily wear stay secure
Daily habits play a big role in keeping your nails in place. If you treat your hands like tools, even the best nails can start to lift at the edges.
Protect your fingertips during high-risk moments. Avoid tapping nails on counters, prying open cans, or picking at a corner that feels “just a little loose.” These actions can cause your nails to pop off later.
Water is another stressor. Try not to soak your hands for long stretches, as water can weaken the bond. Quick rinses are okay, but long baths, dishwater, and hot tubs can shorten wear.
- Wear gloves for dishes, cleaning sprays, and hair dye to guard both the set and your skin.
- Use your knuckles for buttons and switches instead of your tips.
- Keep a small file to smooth snags fast, so you don’t pick at the edge.
Comfort is key, too. Moisturize hands and cuticles daily for comfortable nails. Lotion won’t “lock in” adhesion, but hydrated skin makes your manicure look clean and feel better.
Lastly, plan short breaks between sets when you can. Rotating in rest days helps your natural nails recover. This lets your press-on nails stay secure when you return to your routine.
Avoid nail damage with press-on nails: allergy and irritation risks to watch for
Getting a secure hold should not come with sore skin. To avoid nail damage with press-on nails, pay attention to how your adhesive behaves around the cuticle line. Many cases of nail glue damage start when product spreads beyond the nail and touches skin.
Why acrylate-based glues/tabs can trigger skin reactions if adhesive touches cuticle or surrounding skin
Most press-ons use acrylate-based liquid glue or acrylate-based adhesive tabs. Problems rise when liquid glue seeps out at the sides, then lands on the cuticle or nearby skin. This can irritate fast, even if your nails look fine at first.
Tabs can be simpler for press-on nails without damage because the adhesive is embedded under the nail and meant to sit on the nail plate. Liquid glue is thinner and can migrate during pressure, sizing gaps, or early lifting. Precise sizing and clean placement help keep gentle press-on nails comfortable and neat.
Signs of irritant contact dermatitis (immediate burning, redness, blistering) and what to do right away
Irritant contact dermatitis often shows up quickly. Watch for burning, stinging, redness, swelling, or blistering where adhesive touched skin. This is not a “push through it” moment.
- Remove the press-on right away if you feel burning or pain.
- Soak in hot, soapy water, then work in nail or cuticle oil to help the adhesive release.
- Do not scrape, peel, or try to reapply the nail, as this can worsen irritation and lead to more nail glue damage.
Delayed hypersensitivity reactions from repeated exposure and why people with eczema may be more prone
Delayed hypersensitivity can appear after repeated use, once the immune system becomes sensitized. In that case, even a small amount of acrylate on skin can trigger a bigger reaction later, including itching, rash, and swelling around the nail folds.
People with eczema may be more prone because the skin barrier is already compromised. If you want gentle press-on nails, keep adhesive off skin, use only the amount you need, and avoid lifting that pushes product toward the cuticle. Careful fit and smooth edges support press-on nails without damage while keeping wear more predictable.
How to remove press-on nails gently to protect the nail plate and keep sets reusable
Removing press-on nails without damage is easy: never rip or peel them off. Doing so can harm the nail plate, causing peeling, rough spots, and damage from nail glue. If a set feels stuck, it's a sign to slow down, not to tug harder.
For those new to removing press-on nails gently, start with a warm water soak. Add soap and oil at the edges. Soak for 10–15 minutes, then apply cuticle oil or body oil where you see lifting. Use a cuticle stick to gently ease the sides, letting the nail slide off slowly. If it feels tight, soak longer and try again.
This gentle method helps protect the nail plate. It prevents dehydration and reduces the risk of keratin granulations. Avoiding scraping and peeling means fewer nail cells lift off with the adhesive. This results in smoother nails and a better base for your next set.
To keep reusable press-on nails in good shape, rinse them in warm soapy water and dry them fully. Lightly buff the back to remove leftover glue. Store them in a clean, dry case to keep their shape. If you notice discoloration, remove the nail, lightly buff, and keep it clean and dry.
Prevent future issues by improving sizing, cleaning the nail plate well, and avoiding air bubbles. These bubbles let water in, causing problems. A vinegar soak can help cleanse as the nail grows out.
FAQ
How do you make press-on nails stay secure without glue damage?
Start with a simple plan: prep, size right, use controlled adhesive, and apply carefully. Daily protection and gentle removal are key. This way, your nails stay secure and avoid glue damage.
What does “damage” usually look like after press-ons?
Damage often shows as uneven texture, rough surface, peeling, and discoloration. These issues usually come from how you use and remove the adhesive, not the nails themselves.
What are keratin granulations, and why do nails look patchy after removal?
Keratin granulations are damaged nail cells that look rough and patchy. They happen when the nail is stressed during wear and removal.
Why can press-ons leave nails dry, rough, or peeling even after a “good” wear?
Dehydration is a big reason. The adhesive can dry out the nail cells during wear.
Is nail glue damage harming the nail bed or the nail plate?
Are press-on nails a gentler alternative to acrylics or gels?
How long do press-on nails last with proper prep and care?
What matters most for secure wear—stronger glue or better prep?
How does comfort connect to secure wear?
What is InchArt, and how does it fit into a “secure but gentle” approach?
What’s the best bare-nail starting point before application?
Should you buff your nails before press-ons?
Do you need to cut or trim your cuticles for press-ons to fit?
How can you prevent glue damage with a protective barrier?
Is glitter polish a good protective barrier under press-ons?
Nail glue vs. adhesive tabs—which is safer and which lasts longer?
How much glue should you use to keep press-on nails stay secure?
Can a “weekend set” be better for nail health?
Why is sizing non-negotiable for secure, everyday wear?
How does poor fit relate to hygiene problems like discoloration?
How do you customize sizing if there isn’t a perfect match?
What are the best press-on nails adhesive tips to avoid air bubbles?
Should you apply glue to both the natural nail and the press-on?
What’s the safest way to apply press-ons for a natural fit?
What application workflow makes placement easier and more precise?
What everyday habits help press-on nails stay secure for daily wear?
Does moisturizing help longevity or just comfort?
Should you take breaks between sets?
Why can glue or tabs cause skin irritation or allergy-like reactions?
What are signs of irritant contact dermatitis from nail adhesive?
What should you do if you feel burning after applying press-ons?
What is delayed hypersensitivity, and who is more at risk?
What’s the top rule to avoid nail damage with press-on nails?
How do you remove press-on nails gently without damaging the nail plate?
Why does gentle removal matter so much for nail plate recovery?
How do you clean and store reusable press-on nails after removal?
What should you do if you see green or dark discoloration after wearing press-ons?
Previous
Durability and Design Innovations Influencing Lady Diana Nails Selections
Next
How Do You Choose Press-On Nails That Actually Fit Well?